Removing Your Old Interior
Stripping Out the Cockpit

What a Screwed Up Mess
This is the crazy setup I found in my plane. It was so uncomfortable. And the worst part was that I did not know that this was not normal Ercoupe seating. It was not until I saw another Ercoupe up close and Cathy Boyko explained in an Ercoupe-Tech forum reply something about whip stitching the backrest... that I realized that this was all wrong.

Still Looks OK???
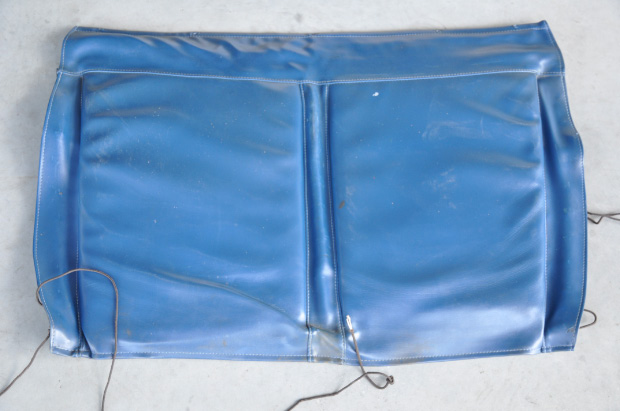
The backrest Naugahyde cover is still intact. That Naugahyde material sure was sturdy, but the underlying foam and canvas are shot. The crazy string lacing in the previous photo stems from some PO coping with a broken support system on the canvas backing that should be tightly laced into the boot hooks on the bottom and sides of the seat frame.
This made the backrest uncomfortable at best and really bad when the string broke... which was often.

The back of the backrest
This is the reverse side of the backrest cover showing the canvas support that carries all the backrest weight. This is supposed to be whip stitched into the seat frame to provide firm support for your back

Broken Whip Stitching Support
Here is a close up of the side whip stitch support that has ripped out of the canvas backing. This makes it impossible to use the backrest as the support material. Instead of repairing this, the POs decided to lace the aluminum seat frame with cord. I'm guessing that, like me, many of the POs just didn't know what was right and proper and what was just a hodge-podge.

Old Side Panels
Now is the time to look at the panels carefully. Match them up to the corresponding Airtex piece and note any differences. My RH panel was going to need some cutting and re-gluing to accommodate my encoding altimeter and a notch at the top front.
On the LH side panel you should recover any of the bezels or signage that you want to reuse.

Old Seat Cushions - Tired, Lumpy and and Flattened
These might look good in the photo, but they were a real problem. When I first got the plane I felt like I was sitting in hole and it was difficult to see enough over the panel. The previous owner included four of those gardening kneeling pads they sell in the hardware store. He suggested that since we were about the same height, I might want use them to raise the seat level. I used two under each seat to get to what seemed like normal seat height.
The new Airtex seat is a one piece design and is very firm and raised me up at least another inch. This could be problem for a 6 ft+ person.
Now is the Time for Some Housekeeping
You should recover any hardware pieces like the aluminum tube that might be there for the wing tank fuel gauge hole and any metal trim from the elevator trim slot.
This is also an opportunity to examine the fuselage interior for any needed repairs, cleaning or touch up work. I cleaned up the LH wing tank fuel gauge lens and bezel area. I also had to deal with an uninstalled wire that was for external audio input to the ICOM intercom. The PO had installed the radio but just left the unterminated wire in the pocket of the RH side panel. I tied it up and hung it from one of cable harnesses under the instrument panel for later attention.
Continue to Next Page
Return to New Interior Main Page
Brian Sanborn N3044H #3669