Installing Your New Cockpit
Start with the Side Panels
Now that the old interior is out, we can start installing the new Airtex pieces. I started with cockpit because it was the easiest and provided the best bang for the buck. If I got delayed, I would have the benefit of the new seats and backrest for my flying. The baggage area could stay as it was without looking completely out of place. I was also facing a deadline of sorts. My son and grandchildren were coming up from Dallas, TX to visit and I wanted that ratty interior out of the plane when I was taking them for their first GA airplane rides.

These are the Side Panels and Rug
The backbone of these side panels is made of a plastic "cardboard-like" material that is strong yet very light. The panels that were there before, used a thin sheet of aluminum as a backing. As well, the naugahyde was very heavy compared to the new cloth and vinyl materials. These new panels are about one third the weight. In addition, the cellular structure helps with heat and cold insulation, as well as sound deadening.
The cockpit rug is well fitted and comes with snap buttons that are screwed into the floorboard.
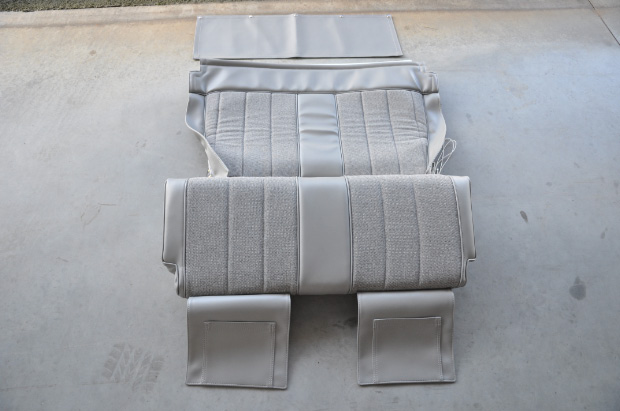
This is the New Comfort Zone
The Seat and backrest are very well made and exceed my expectation for good looks and quality. The seat is a one piece unit that is designed to snugly fit between the seat side walls. It is shaped to provide more hip room. Our Ercoupes don't provide much space for our mature backsides. The trick is that the seat side panels are designed to be applied directly to the outer fuselage skin rather than be mounted across the "C" and "D" frame. My old interior seat sides used a stiff aluminum sheet and left unused space behind the panel. Notice the dogleg in the front of the cushion. That notch fits behind the "C" frame and locks the seat in place as well as adding about 3+" of hip room.
The long rectangular vinyl piece is provided for the standard baggage cover.

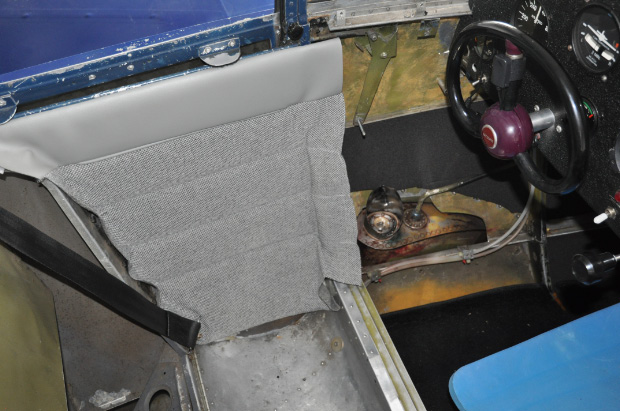
The RH seat Side Panel Goes in Easy
This could not be any simpler. It fit perfectly into the space between the C & D Frames. Notice how the lower part creates some extra space for the seat to notch into. The top is held in place by the stiff plastic backing material. I did not have to attach this with any screws, glue or tape.
If the aluminum trim on top is painted the wrong color or needs touching up, you should take the time now to rough up the surface with ScothBrite and paint it in a matching color. You will see in photos farther down the page that I went back and did this.
The LH Seat Side Fits easily - But This Side Needs More Attention
This side slips in as easy as the other side. However, there are two special areas on this side. The elevator trim, if your plane has it, is located here. And the LH wing tank gauge if your airframe incorporates that modification.

The Elevator Trim Lever Area
You should clean up this area because it shows through the opening in the LH side panel. At first, I painted this area to match the gray color of the vinyl trim. That did not work out to my satisfaction because what showed through was not a uniform surface that could be painted. A PO had installed insulation in the fuselage sections here. You will notice in later pictures that I decided to line the area in scrape vinyl.

LH Wing Tank Gauge Viewing Tube
This area will no doubt benefit from a major cleaning. This is my first attempt at using the view tube from my old interior. I was not sure whether I could use this piece or not. For a bunch reasons, I removed it when I did the final install of all the pieces. I just could not get this to work with the new panels. I have an annual in two months and all the interior will be out and I will try to figure out what is wrong. I suspect that the new panels are stiffer and "stand off" the fuselage side a bit more than the old panels.

Custom Trimming the RH Side Panel
I had to trim this RH side panel to match the old side panel. My plane has an encoding altimeter installed on the RH fuse side wall under the instrument panel. it also requires a notch cut out of the top front area. In the photo I am using duct tape to hold down the extra cloth while I was test fitting. When the fit was right I used contact cement to make the changes permanent.

This Rough Area Needs Some Attention
The area above the top of the side panel needs some attention. I have noticed many different arrangements here. My old interior panels were hand made and came up all the way to cover this. I have seen pictures of other planes where there is a sheet metal panel over the area. I wanted to follow the example of the Airtex sample interior shown in the Planning Page. My first effort was to paint it to match the vinyl trim color. You will notice in later pictures that I then went one step further and trimmed this in scrape vinyl.
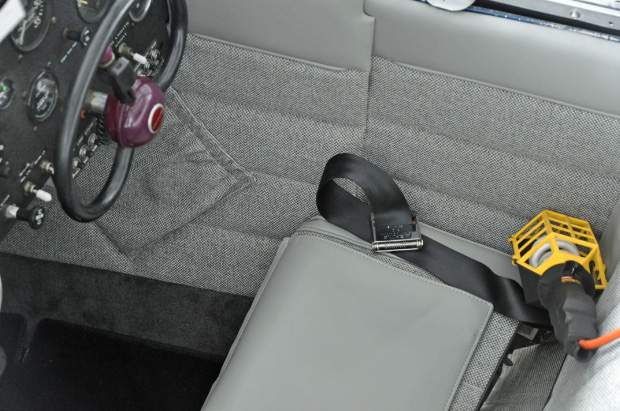
Seat Just Pushes into Place
I'm sorry I don't have a better picture here. Once the all the side panels are in place the seat just drops into place with a sung fit. If you have not seen these before, the vinyl flaps are there to allow you to get into the plane and step on the flaps instead of the seats. This prevents dirtying the fabric. As you slide down the seat back you move the flap out of the way.

Seat Backrest Showing the Cover and Foam
I went off the rails on taking pictures while wrestling with the stitching of the backrest to the frame. I will take some pictures after annual is done as I am reinstalling the interior. The new backrest has three layers. The outer cloth and vinyl layer which has some foam imbedded to allow the stitching to pop up. Then there is a generous closed-cell foam layer

The Canvas Backing Layer
And then the canvas backing that has holes on the sides and bottom that are reinforced with brass grommets similar to what you find on a boat tarp.

The Whip Stitching of the Canvas Backing
This shows the whip stitch or lacing technique that that is used to stretch the canvas backing across the seat frame. The frame has "boot hooks" along the sides and bottom. The strong holes in the canvas layer are laced into the frame to make a strong and comfortable seat back.
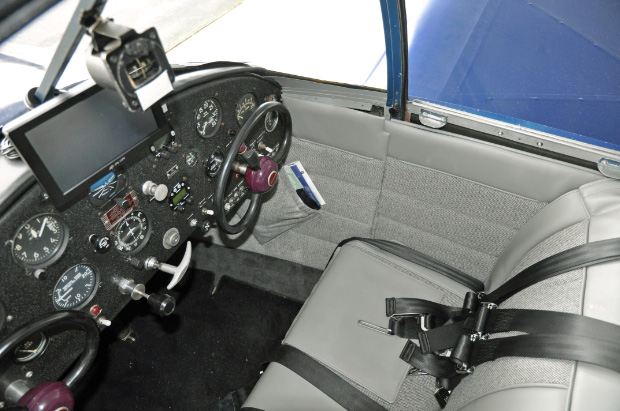
LH Side of the Cockpit
Here... everything is in place. Notice the top of the side panel area that has been painted to match. It looks much more finished. The aluminum trim piece on the top of the seat side panels has also been painted to match. You can now see how the dark blue rear windshield support is looking out of place. It and all the interior metal surfaces will be painted in light gray to match the vinyl trim color.
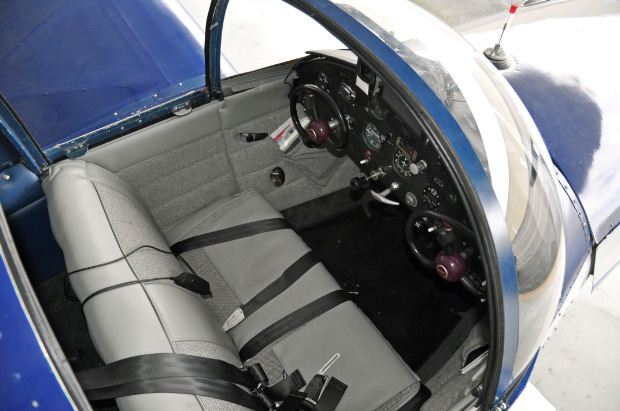
RH Side of the Cockpit
What an improvement!!! This feels like a new plane, at least, from the inside out. The comfort level is radically improved and the extra hip room relives some of that "too tight" feeling in the seats. Initially, I noticed that I was sitting up higher but some of that as gone away as the seat bottoms settle in.
Continue to Next Page
Return to New Interior Main Page
Brian Sanborn N3044H #3669